Set a custom location for the MathType Equations Editor (Traditional)
Settings for the MathType Equations Editor can be configured as part of your initial installation of Jama Connect or any time you need to make changes.
Note
The MathType Equations Editor requires a separate license. After your organization has purchased the license, and the system administrator sets up a location for the editor, users can access the editor in the Rich Text Editor in Jama Connect.
Airgap or self-hosted instances of Jama Connect can add math and chemical equation options to the rich text editor without making calls to an external server.
Before enabling the MathType Equations Editor, you must:
Designate a server inside your environment that can listen for MathType calls and responses. Check for the latest supported version on the Community.
Acquire a MathType license from Jama Software.
To configure settings for MathType Editor:
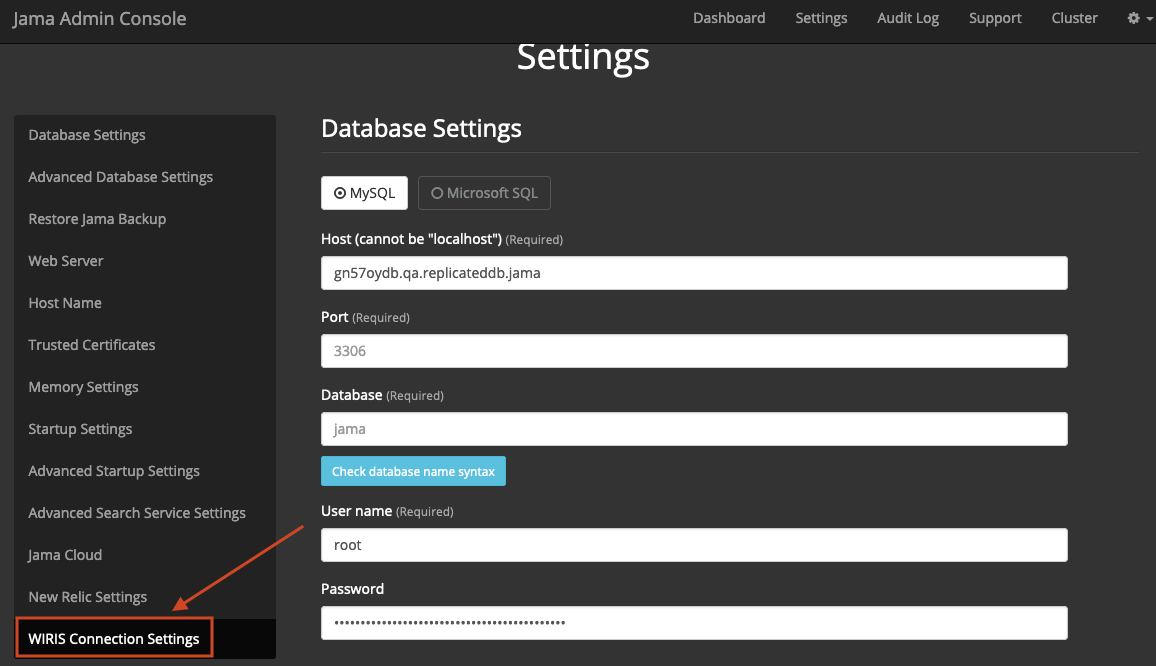
Log in to the Admin Console.
In the side panel, select WIRIS Connection Settings.
Select Use custom WIRIS connection to override default settings for communication with the WIRIS cloud servers.
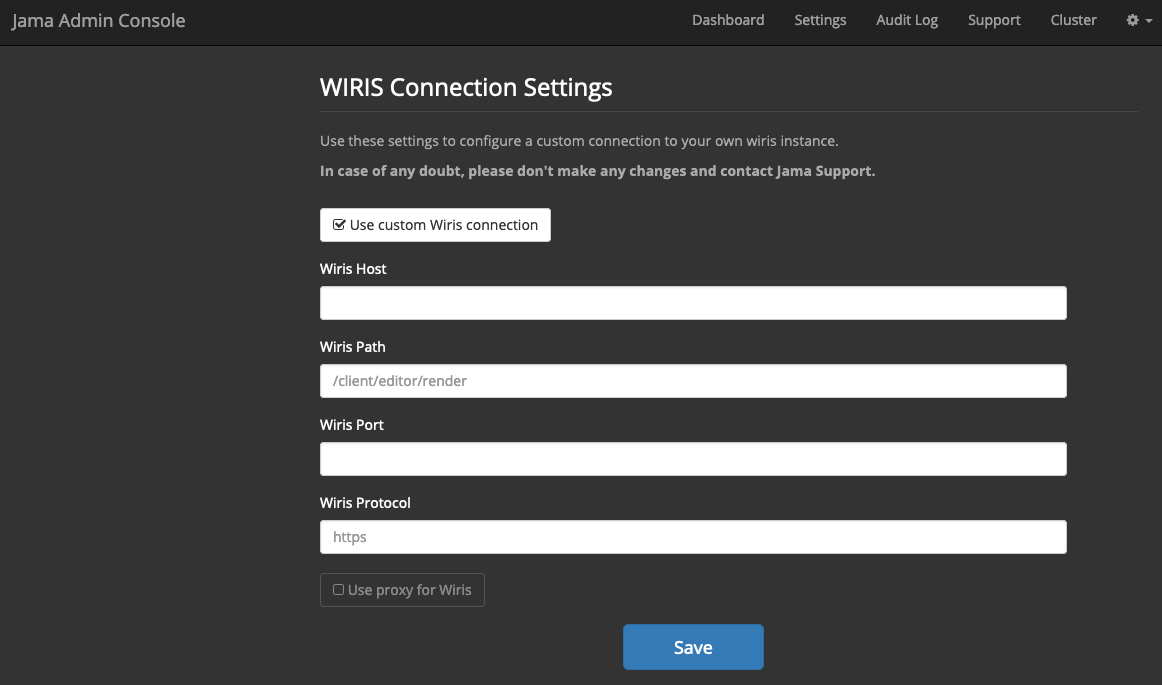
Enter the following information for your designated MathType server:
WIRIS host (Required) — Enter the hostname of your MathType server. This must be accessible from both the Jama Connect application server and the user's browser. Don't include the port or protocol.
WIRIS path — Enter the context path followed by "render." Depending on how your server is set up, it might look like this:
/editor/render
WIRIS port — The defaults are 80 for http and 443 for https. You can override these values by entering a different port number.
WIRIS protocol — This is https or http. If you use https to link to Jama Connect, you must also use https for WIRIS.
Note
Additional settings for proxy are available but haven't been fully tested. You can use these settings if your Jama Connect instance needs to use a proxy to connect to the MathType server. However, these settings don't change how your browser connects to the MathType server.
Scroll to the bottom of the page and click Save. A message confirms that your settings were saved.
To apply settings, you must restart the application:
Immediately — Select Restart now.
Later — Select Cancel and Restart later.