Install Jama Connect (traditional airgap)
An installation wizard walks you through the process of uploading the license file, installing Jama Connect, and configuring the Admin Console.
To start the wizard, you use the URL that was generated when you installed the Admin Console.
Make sure that you have the license file that was included in the Welcome email you received from Jama Software.
To install Jama Connect:
Open the Welcome email and save the license file to the /data/install directory on your application server.
In a supported browser, enter the URL for the Admin Console.
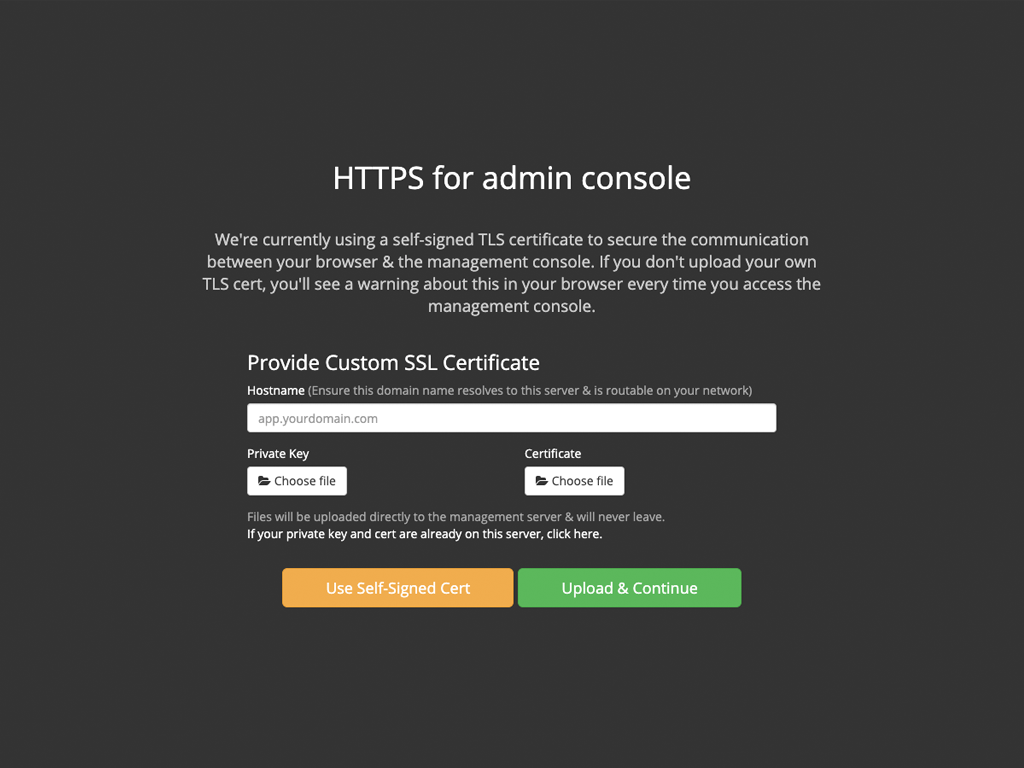
Enter your hostname.
Select the appropriate option:
Have key/certificate — Select Choose file under Private key and Certificate, navigate to the files, then click Upload & Continue.
No key/certificate — Click Use Self-Signed Cert.
Click Choose license to upload your license file.
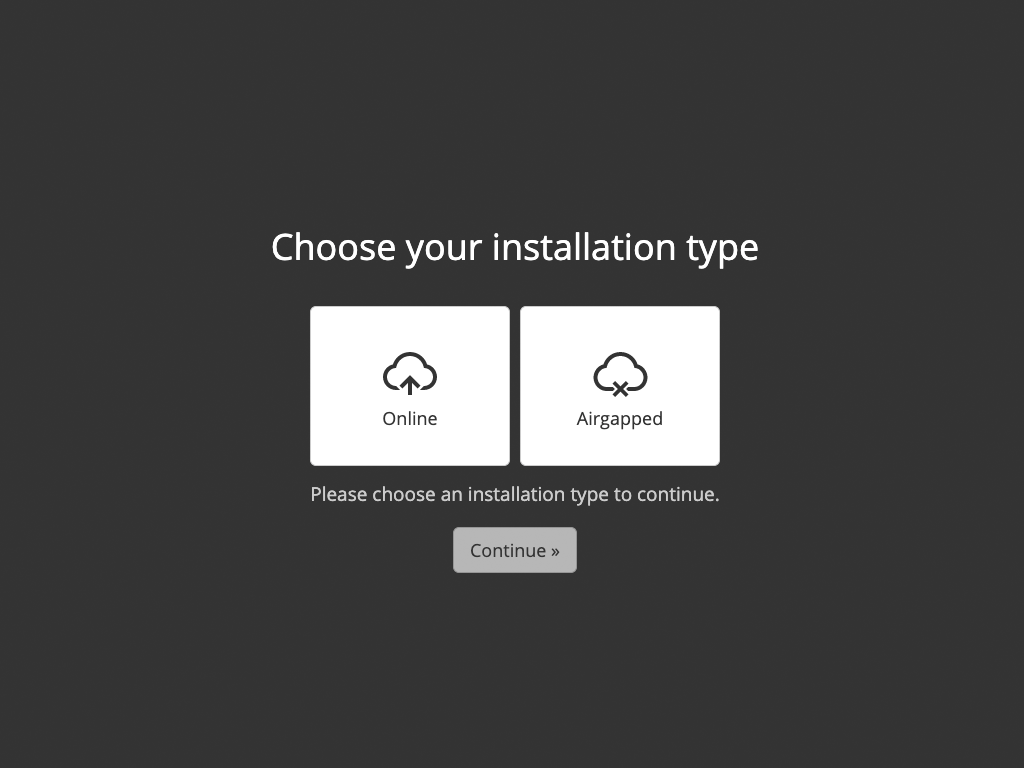
Select Airgapped for your installation type, then click Continue.
Important
If you mistakenly select Online as your installation type, an internet installation begins. The only way to correct this is to uninstall Replicated, reinstall it, and start this task again from the beginning.
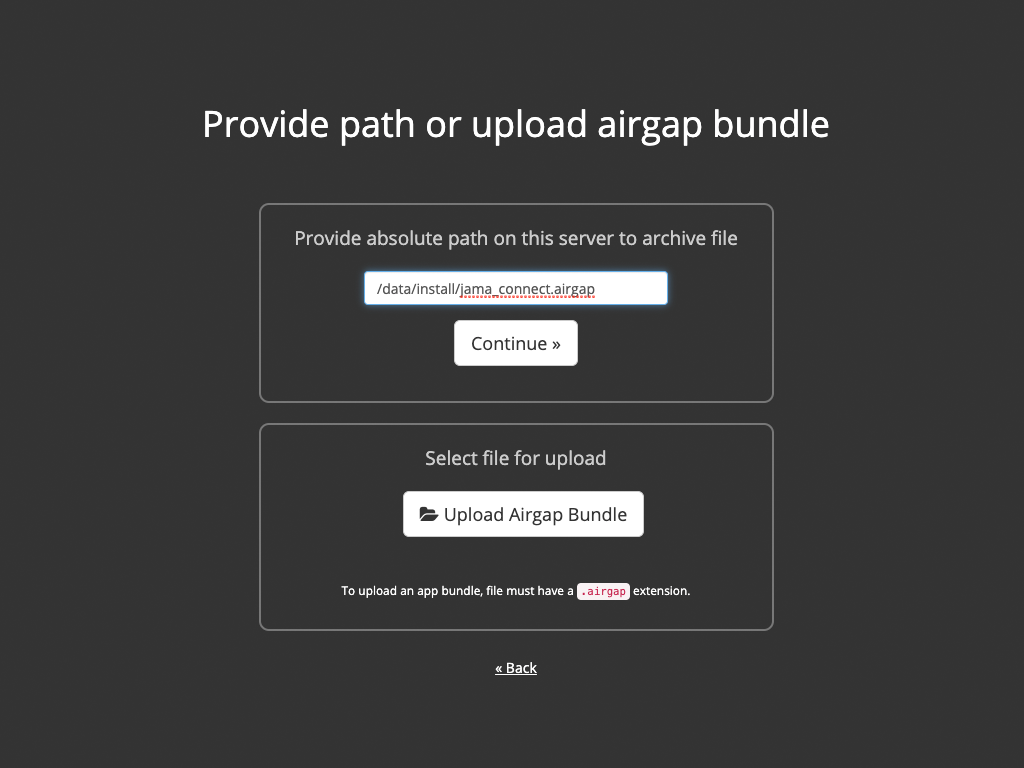
Upload your license using one of these methods:
Enter /data/install (the path of directory where you saved the license file on your application server), then click Continue.
Click Upload Airgap Bundle.
The system installs the airgap package, then performs the preflight checks.
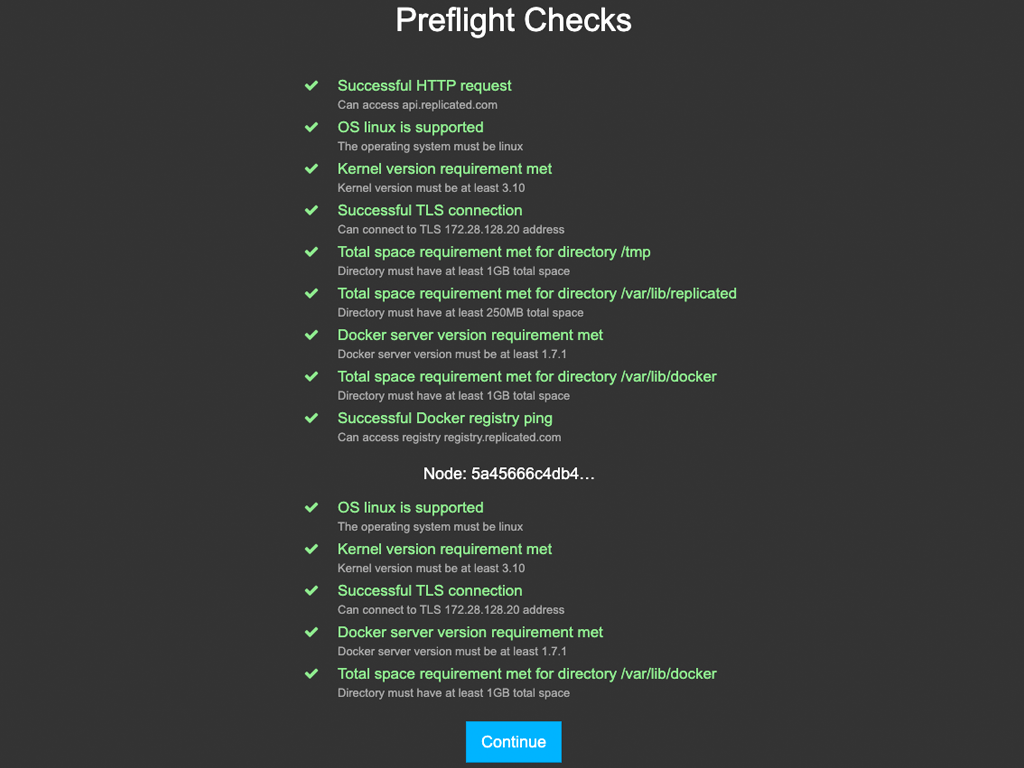
When the preflight checks are complete, click Continue to open the Settings page for the Admin Console.
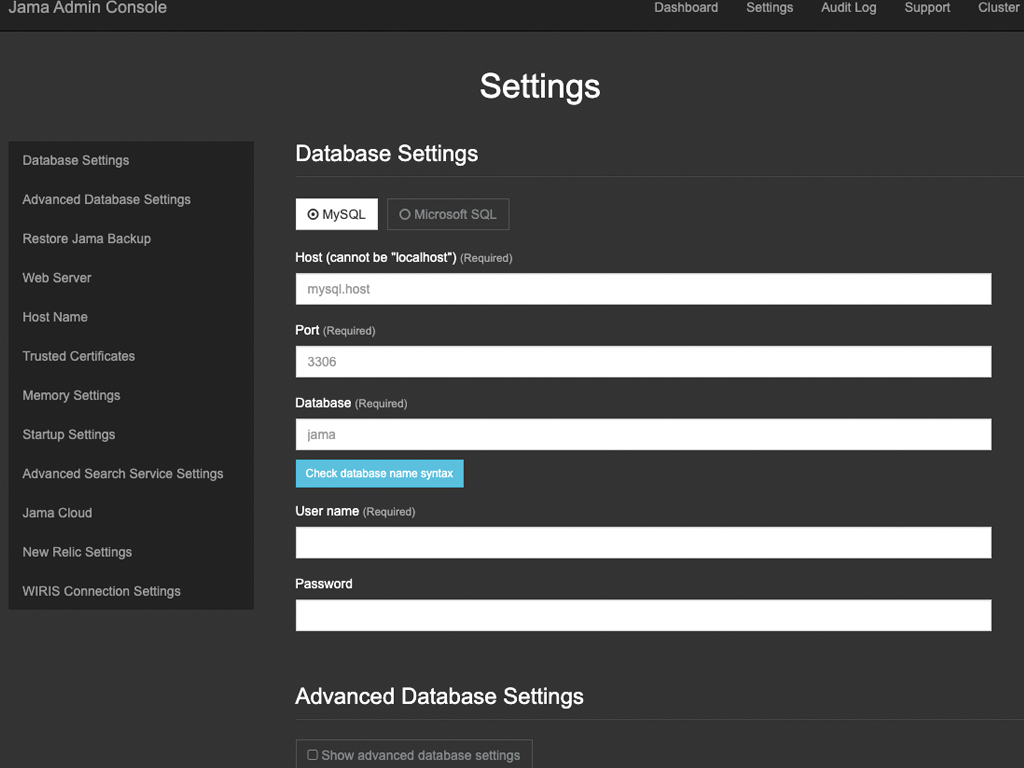
Configure the settings for each group, as needed. Scroll down to see each group of settings.
Database Settings — Use the information from Preparing your database server.
TLS Key & Cert — (Optional) If you have the key and certificate, click Choose file to select them.
Airgapped Settings — (Optional) Enter a new path for airgap update packages and for the license file.
Scroll to the bottom of the page and click Save. You see a confirmation that your settings were saved.

Click Restart now. The system restarts and opens the Admin Console.

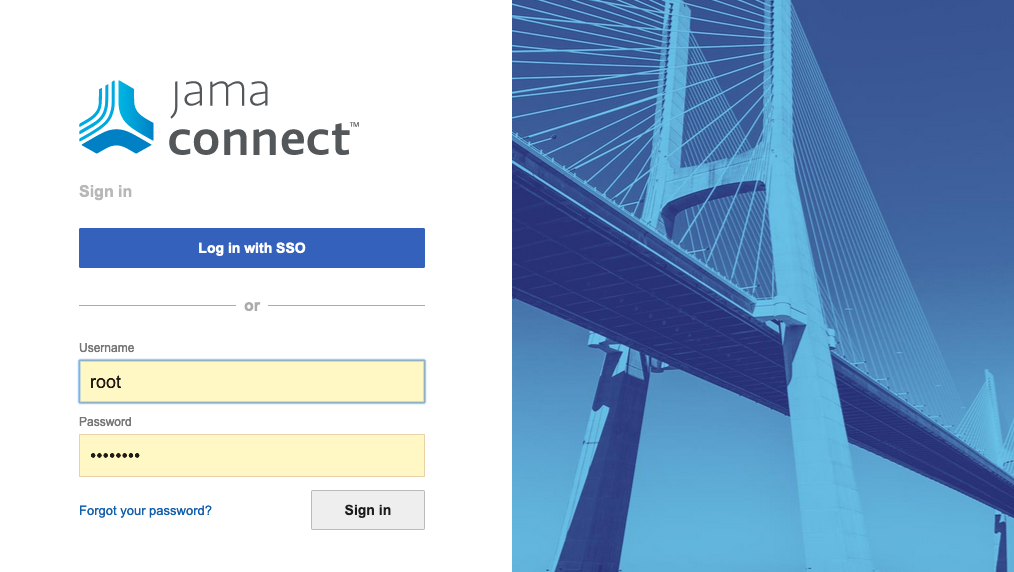
Log in to Jama Connect as root.
Your installation of Jama Connect is complete.