Provision your tenant in Jama Connect KOTS (upgrading traditional to KOTS)
After upgrading the KOTS Replicated environment, you must provision the existing tenant in the new environment.
Important
The KOTS Admin Console doesn't support formulas. Instead, use literal values.
To provision your tenant in KOTS:
From the KOTS Admin Console, select the Config tab.
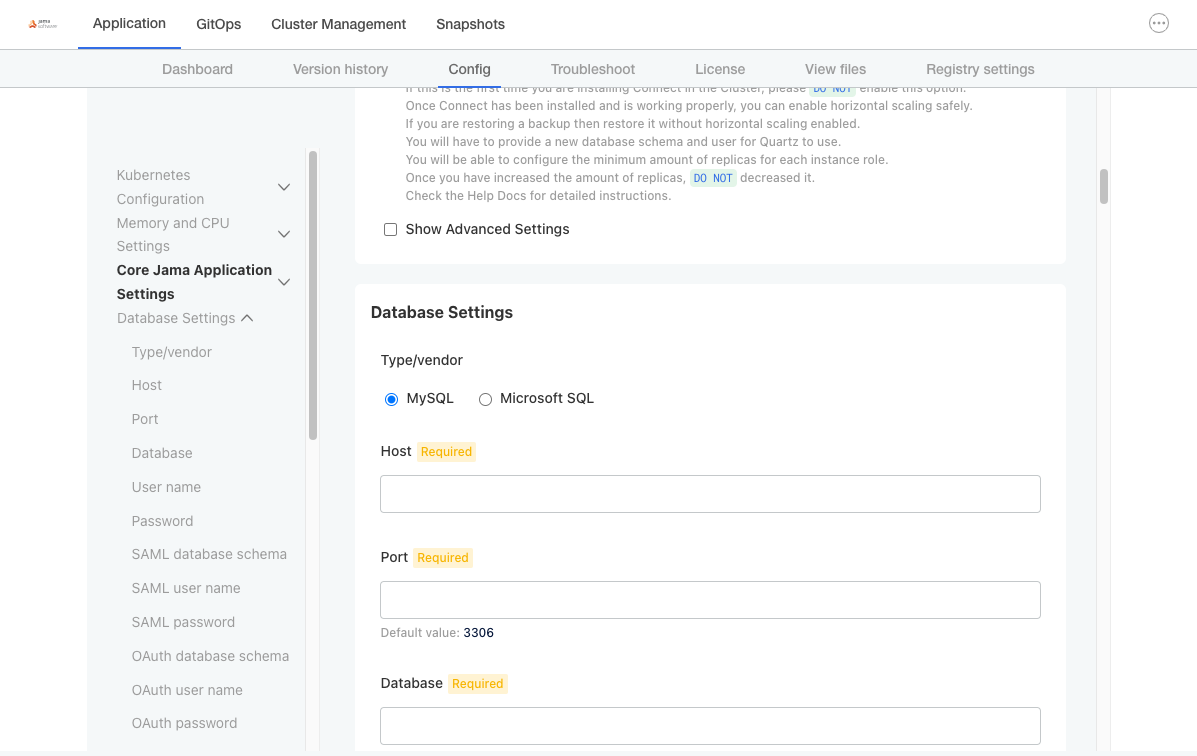
Configure the settings for each group, as needed. Scroll down to see each group of settings.
Important
Make sure that the current Host name, Database name, Username, and Password are configured correctly in the KOTS Admin Console. If you installed KOTS in a new environment, you must point to the newly installed database host or the deployment fails.
Database Settings — Select your database type (MySQL or Microsoft SQL Server), then use the information from Preparing your database server to complete the settings.
Host Name — Enter the name of the database server (for existing resources, enter current name; for new resources, enter the new name).
TLS Key Pair Source — (Optional) If you have a custom key and certificate for the host name, select Custom TLS Configuration. In the TLS Configuration section, upload the key and certificate.
Assets Size — Enter the estimated size of the assets based on the current data assets size of your environment and its projected growth.
OpenSearch Settings > Volume Size — Enter the amount of disk space that each OpenSearch node is allowed to use.
(Optional) From the Config tab in the KOTS Admin Console, follow the steps to configure KOTS to save tenant assets in the Amazon EFS.
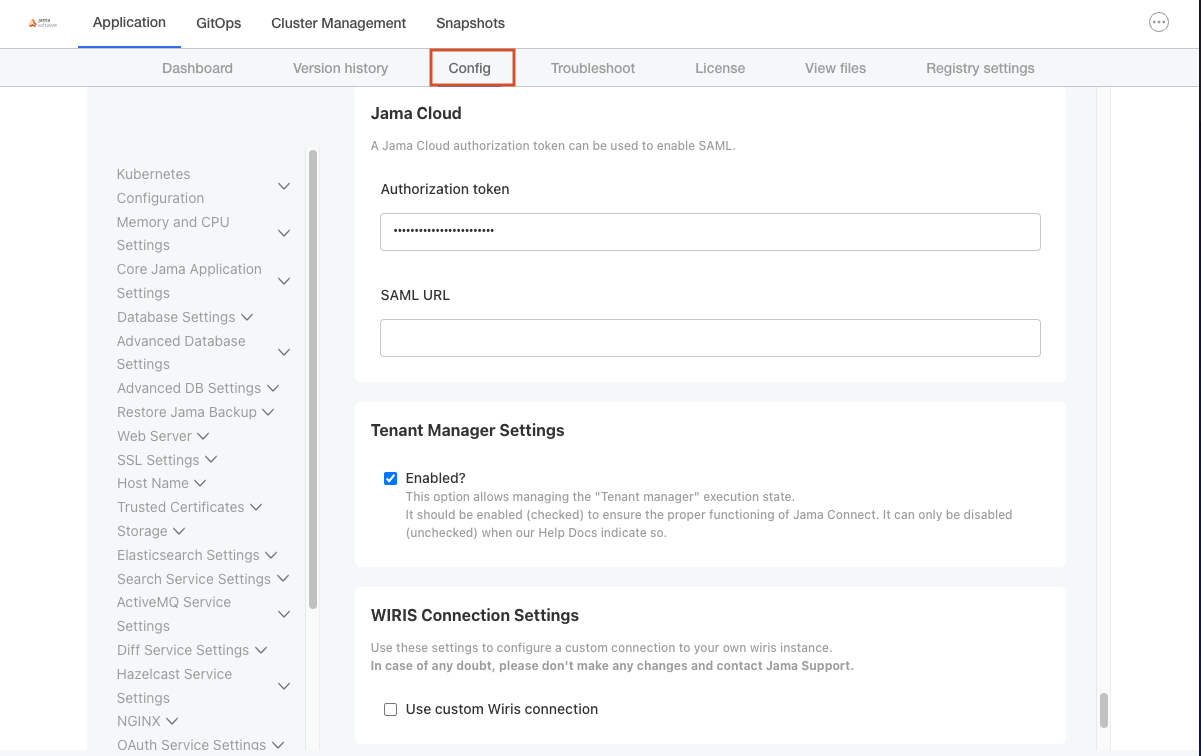
Scroll down to Tenant Manager Settings and deselect the checkbox to disable it.
Disabling the Tenant Manager prevents Jama Connect from completing tenant provisioning, which allows you to copy data assets and tenant.properties from the traditional replicated environment to the KOTS environment.
Scroll to the bottom of the page and select Save config.
The Preflight checks run.
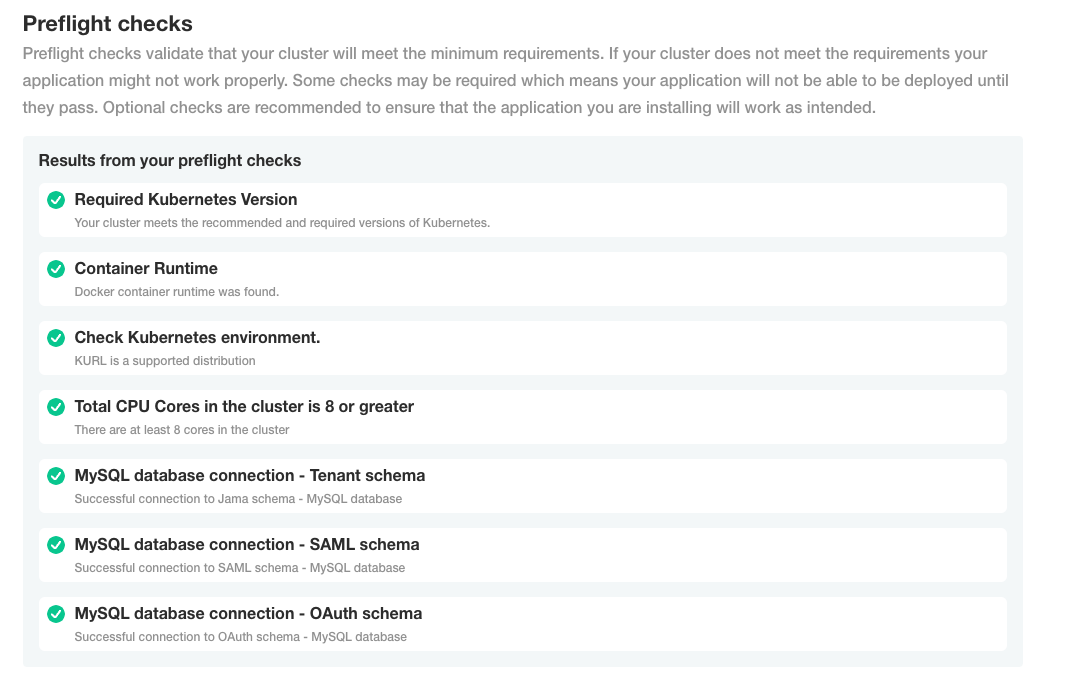
From the Preflight checks screen, select Continue to deploy the Jama Connect application and services.
When the system is available, the status in the KOTS Admin Console changes to Ready.
The deployment process can take up to an hour.

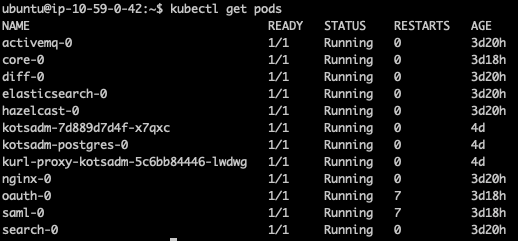
When the preflight checks are complete, Jama Connect creates the Kubernetes pods, which contain the Jama Connect application and related services.
From the application server CLI, verify that the Kubernetes pods were successfully created:
kubectl get pods
Application server CLI example:
When the pods are ready and running, copy the data assets, which you preserved in an earlier task, to an accessible location on the application server.
On the application server, set the tenant name for the environment (the tenant name, usually jama, and can be found in the tenant.properties file is the name of the Jama Connect database schema):
export TENANT_NAME=<tenant_name>
On the application server:
Copy and extract the previously preserved data assets into the running core pod and change the ownership permissions:
kubectl cp -c core /tmp/contour/assets.tar.gz default/core-0:/home/contour/tenant/${TENANT_NAME}/
kubectl exec --tty -c core pods/core-0 -- tar -xvzf /home/contour/tenant/${TENANT_NAME}/\
assets.tar.gz -C /home/contour/tenant/${TENANT_NAME}/

kubectl exec --tty -c core pods/core-0 -- chmod -R 755 /home/contour

kubectl exec --tty -c core pods/core-0 -- chown -R tomcat:tomcat /home/contour
Delete the core stateful set to recreate the core pod:
kubectl delete sts/core
From the KOTS Admin Console, select the Config tab, enable the Tenant Manager Settings, then select Save config.
Remove entries from the Jama Connect database tenantstate table to prepare for a new deployment:
DELETE FROM tenantstate;
To deploy the new version of Jama Connect:
From the KOTS Admin Console, select Deploy next to the newly saved version of Jama Connect.
When the deployment is complete and all pods are running, log in to Jama Connect as root using the hostname configured for Jama Connect.
If upgrading with new servers:
SAML authentication must be configured in the new KOTS Jama Connect environment.
Update the base URL before performing a full reindex.
Perform a full reindex in Jama Connect to complete the deployment.
The existing tenant is now provisioned in the new environment.