Configure multi-mode authentication
The combination of Jama Connect Basic and SAML authentication (Basic + IdP) provides extra security by separating your internal users from external partners.
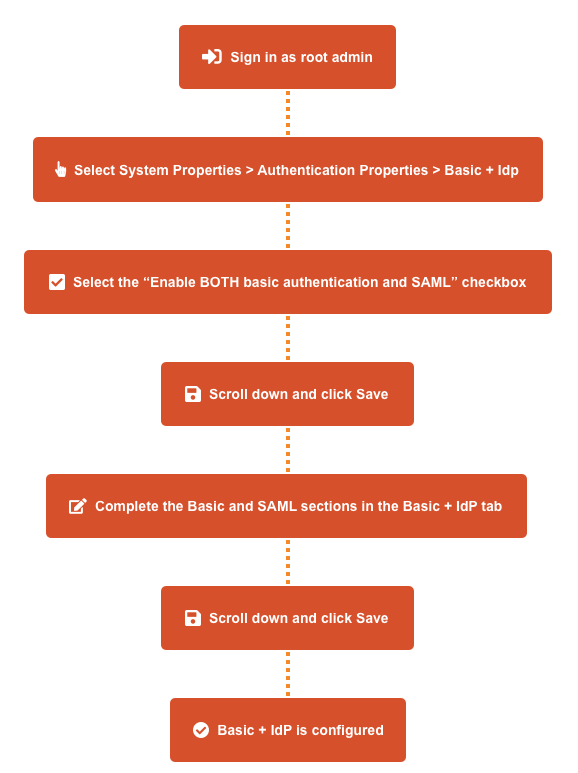
To configure multi-mode authentication:
If you haven't entered the SAML metadata in the root menu, go to the SAML tab and enter it there.
Contact your identity provider for the metadata URL or XML, then paste it in the appropriate field. If a connection is established, the last three read-only fields are auto-populated with a URL.
SP metadata URL — https://saml-or.jamacloud.com/saml/metadata/alias/defaultAlias
ACS / single-sign-on URL — https://saml-or.jamacloud.com/saml/SSO/alias/defaultAlias
SP entity ID / Audience restriction — https://saml-or.jamacloud.com/saml/metadata/alias/defaultAlias
If the connection doesn't work, you might need to adjust the information in the ACS binding, First name attribute mapping, and Last name attribute mapping fields or contact support.
Tip
The mapping fields are the key that connects user identity between Jama Connect and your identity provider. If name attribute mapping fields aren't specified, a new user's full name defaults to their email address.
Select System Properties > Authentication Properties > Basic + IdP.

Select Enable BOTH Basic authentication and SAML, then select Save.
The Basic + IdP tab transitions can now accept input. While the Basic and SAML tabs are now read-only This type of input is the same on both tabs: Basic and SAML.
Complete the Basic and SAML sections in the Basic + IdP tab:
Basic — Fill out the the Basic Authentication section.
SAML — If you haven't entered the SAML metadata in the root menu, complete the following steps in the SAML section of the Basic + IdP tab.
Note
The following selections for the Match on field configuration are beta features that are under development: Username, Custom identifier (NameID), and Custom identifier (Attribute). For now, use the default Email selection. If you're interested in beta testing the Username or Custom identifier selections, contact your account manager.
Select Save.
Confirm the configuration was successful: Select the Users tab, then verify that the Authentication Type column appears in the table.
If you see the Authentication Type column, Basic + IdP authentication is now enabled.
